Layby on the A82 near Stob Coire Raineach, Glencoe. Popular spot — arrive early to secure parking.
We originally planned to tackle Ben Challum on this spring morning, but a detour led us to one of the mountains that had eluded us for years: Stob Dubh. A few years back, fresh out of recovery from COVID with limited training and no winter kit to speak of, we’d attempted this same peak but were turned back by snow and ice. We’d managed Stob Coire Raineach that day instead, lesson learned about respecting Scottish winter conditions.
When we arrived at Ben Challum’s carpark to find it closed for resurfacing works, we faced a choice. Rather than drive elsewhere, we spotted the layby for Stob Dubh and Stob Coire Raineach just down the road. This time, conditions would be entirely different.
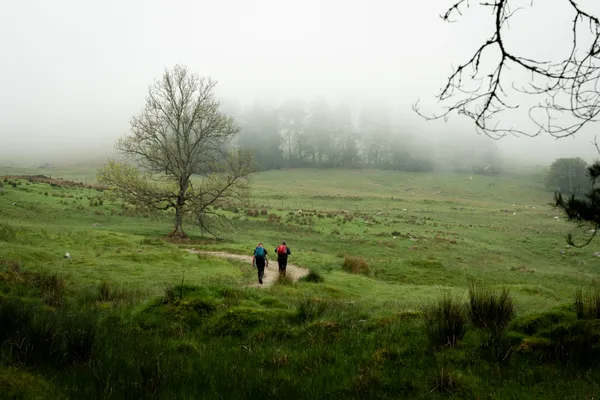
The Day in Numbers
- Distance: 7.86km
- Elevation gain: 1,087m
- Time on hill: 4 hours 27 minutes
- Conditions: Dry and bright, but incredibly windy
- Difficulty: Moderate with exposed ridge section
The Route: Step-by-Step Guide
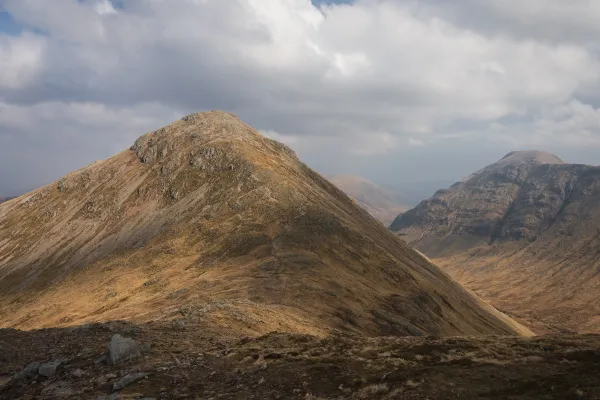
The path is exceptionally well-marked and easy to follow throughout. From the layby, the route climbs steeply through the glen, gaining significant elevation in a continuous push. The going is straightforward — no scrambling required, well-maintained path underfoot, and clear signage at key junctions. The final approach to the summit involves a ridge traverse with genuine exposure to both sides. In calm conditions this would be a pleasant walk; on the day we visited, the wind was relentless.
Getting Started: The Layby to the Path Head
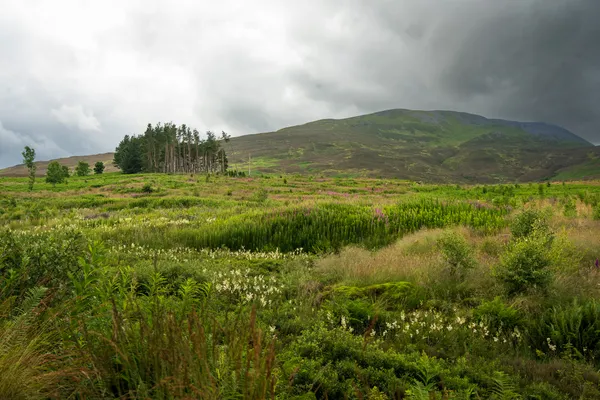
From the small layby on the A82, head towards the obvious path that begins at the foot of Buachaille Etive Beag. There’s a small cairn marking the start of the trail. The path is clear and well-signposted — head northeast away from the road towards the ridge. This initial section is relatively gentle, following the edge of a small watercourse through heather and rough grass.
The Main Climb: Steep Ascent to the Ridge
Once you’ve left the glen floor, the path steepens significantly and the real work begins. This is a sustained, unrelenting climb that gains most of your elevation in one push. The path zig-zags uphill, well-constructed and easy to follow even when steep. You’ll move through patches of grass, loose stone, and occasional rocky ground, but the trail is always obvious.
Landmarks on this section:
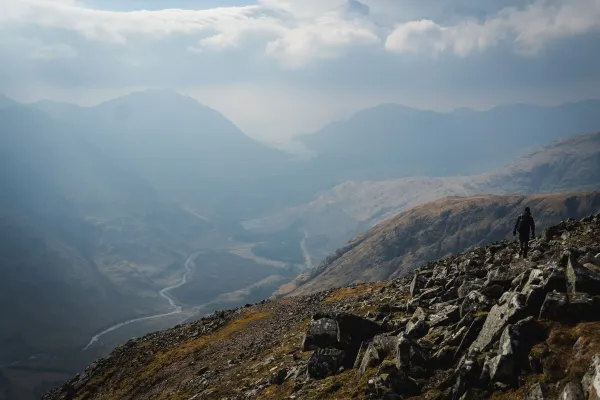
- Partway up the climb, you’ll pass a small plateau area with expanded views back down the glen
- As you gain height, the path becomes more rocky underfoot
- Look back periodically — the views down into the glen are spectacular, and they improve with every metre of elevation
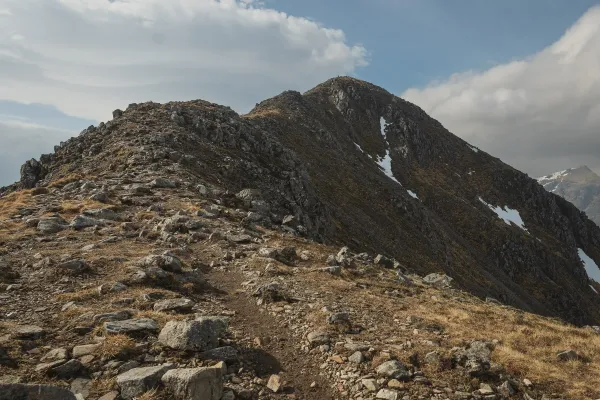
The Ridge Approach: Final Climb to the Bealach
As you near the top of the initial climb, the terrain becomes rockier and more rugged. The path continues upward but begins to trend northward, leading towards the bealach (mountain pass) between Stob Dubh and Stob Coire Raineach. The final section approaching the ridge involve some scrambling over rocky terrain, but it’s straightforward and the path remains clear.
The Bealach Decision Point
You’ve now reached the col between the two peaks. From here, you have two options:
- Left (south) leads to Stob Coire Raineach (925m) — slightly lower, easier approach
- Right (north) leads to Stob Dubh (958m) — higher, more exposed ridge traverse
For Stob Dubh, take the right-hand path.
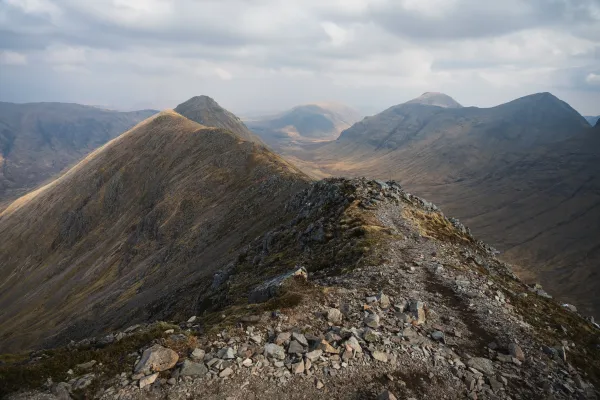
The Ridge Traverse to Stob Dubh
This is where the route becomes genuinely exposed. The path narrows and you’re now walking along a ridge with drops on both sides. The path itself is well-defined and not technically difficult, but the exposure is real — particularly in wind.
Key sections:
- Immediately after leaving the bealach, the ridge climbs steadily northward
- The path hugs the east side of the ridge, with the drop to your left (west)
- You’ll encounter a small false summit — this is not the main peak, continue onward
- The path then descends slightly before climbing again towards the true summit
- The final push to the summit cairn is steep and rocky, with exposure on both sides
Wind and Stability: If the wind is strong (as it was on our visit), take your time here. Use trekking poles wedged into the ground for stability, and brace yourself against gusts. The exposed sections are where your full concentration is needed.
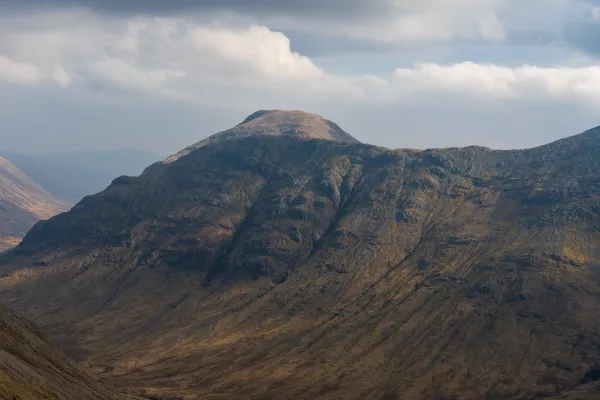
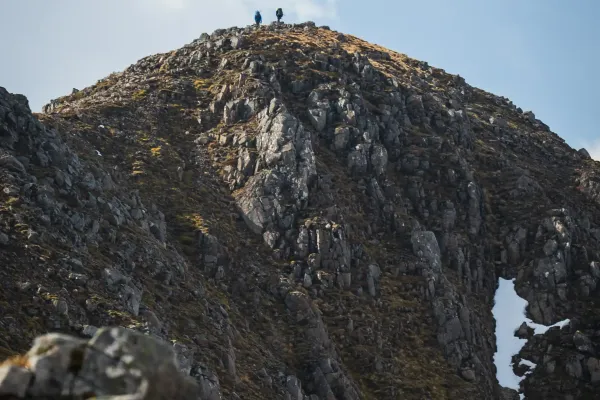
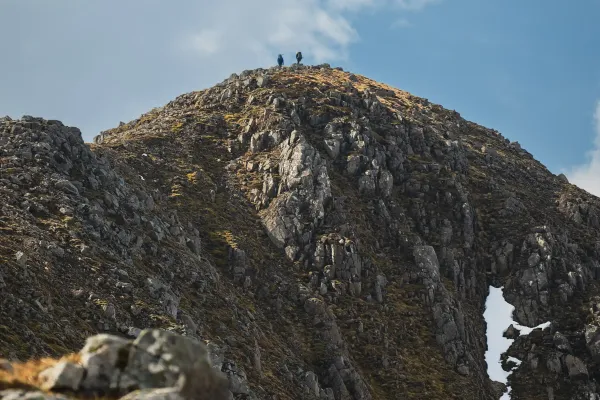
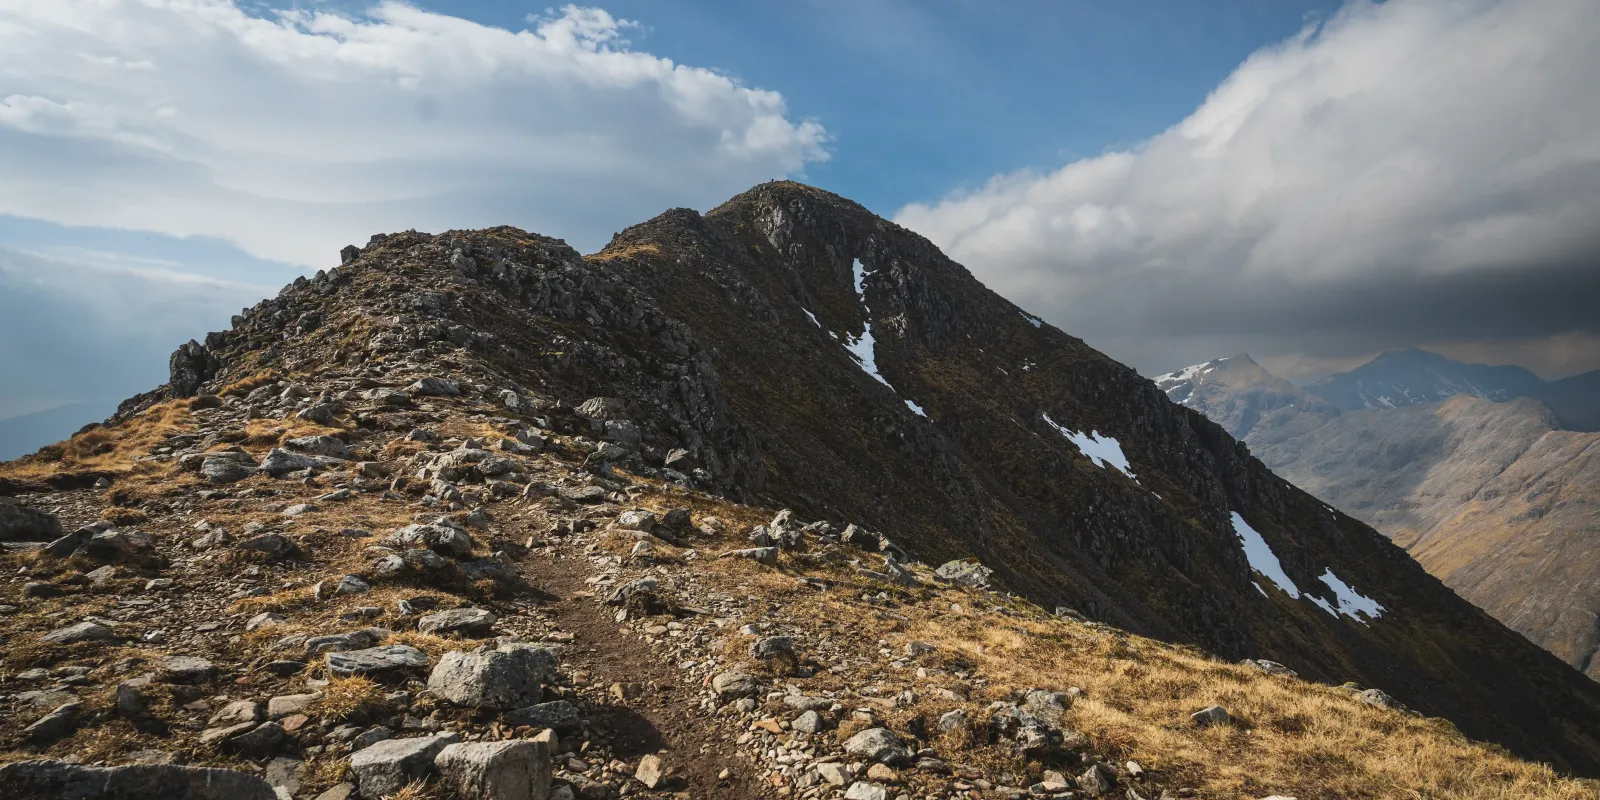
The Summit: Stob Dubh (958m)
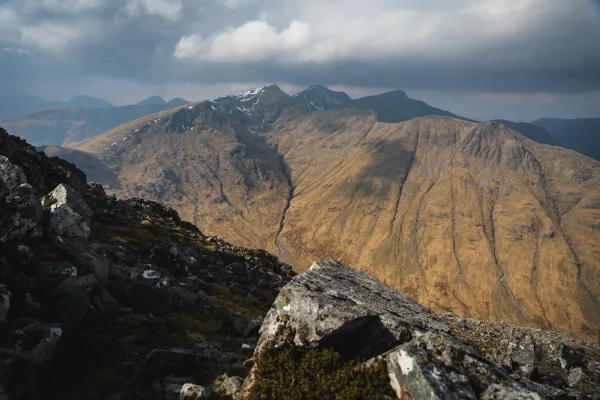
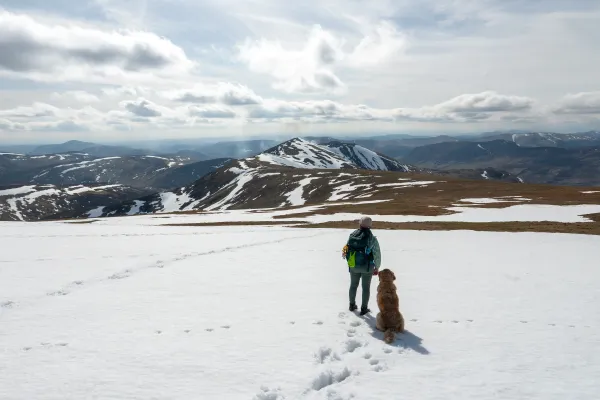
The summit is marked by a large cairn and offers 360-degree views across Glencoe and beyond. In clear conditions, visibility extends for many kilometres. The summit area is relatively small, so there isn’t much space, but it’s unmistakable.
Time at summit: Allow 10–15 minutes to rest, take photos, and enjoy the views before beginning your descent.
The Return Route
The descent follows the same route in reverse. The journey back is faster than the ascent, as descent generally is. Retrace your steps along the ridge traverse, then down through the main slope, and finally the walk-out to the layby.
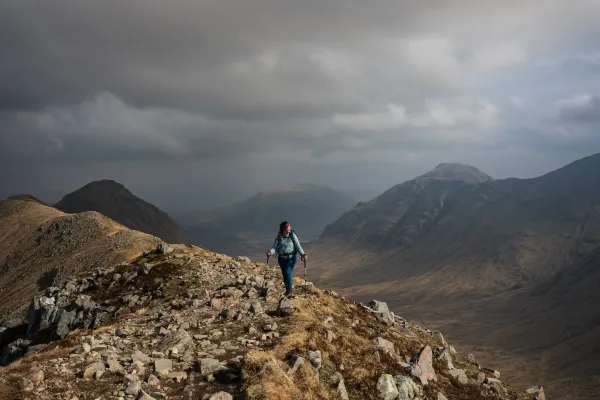
Conditions: Wind and Exposure
The forecast had promised dry, bright weather — and it delivered exactly that. Visibility was excellent, the sky was clear, and the sun was out. What the forecast understated was the wind. The ridge traverse to Stob Dubh’s summit was brutally exposed, and we found ourselves using trekking poles not for the terrain (which didn’t require them) but simply to help keep upright against the constant gusting. The poles became essential stability aids — wedged into the ground when the wind was strongest to keep us anchored.
It was a reminder that good weather doesn’t always mean comfortable conditions. Dry and sunny can still mean exposed and challenging.
Parking — Arrive Early
The layby fills up quickly. These mountains are incredibly popular, and the limited parking can be a genuine bottleneck on good-weather weekends. We managed to find a space, but it was clear from the turnover and the cars waiting nearby that arriving early is essential if you want to guarantee parking. The carpark situation in Glencoe is one of the perennial challenges of hillwalking in this region.
Success After Years
Standing on the summit after years of wondering “next time, maybe” felt significant. The views across Glencoe were exceptional, and the satisfaction of finally completing this peak — especially after being forced to turn back in winter conditions on our previous attempt — made the windy ridge traverse entirely worthwhile.
This was one of those unplanned successes that make mountain days memorable. Sometimes the best adventures are the ones you didn’t schedule.
Related Routes
If you’re planning to visit this area, you might also be interested in combining this peak with its neighbouring Munro. Stob Coire Raineach is easily accessible from the same bealach and makes for an excellent pairing — many hikers tackle both peaks in a single day for a more substantial mountain experience.
Frequently Asked Questions
Can you do Stob Dubh and Stob Coire Raineach together? Yes, and it’s highly recommended. From the bealach between them, you can tackle either summit independently or combine both in a single outing. The bealach is your decision point — most hikers do both peaks since they share the same parking area and the extra effort is minimal.
Is Stob Dubh a good first Munro? Not really. While the path is well-marked and straightforward, the exposed ridge traverse to the summit demands respect and mountain awareness. If there’s significant wind (as there was on our visit), it becomes considerably more challenging. Save this for after you’ve bagged a few easier peaks like Ben Lomond or Schiehallion.
How do I stay safe on the ridge traverse in wind? Take your time and use trekking poles. Wedge them into the ground to anchor yourself during the worst gusts. In strong wind, consider turning back — the summit will be there on a calmer day. There’s no shame in retreating from an exposed ridge in dangerous conditions.
What’s the parking situation like? The layby fills up quickly, especially on good-weather weekends. Arrive early (before 9am) to guarantee a space. The car park for Stob Coire Raineach uses the same layby, so it gets busy with hikers tackling both peaks.
Can you do this in winter? It’s possible, but winter conditions change the route significantly. The exposed ridge becomes more serious with potential snow and ice cover. Crampons, an ice axe, and winter mountaineering experience are essential. We wouldn’t recommend this as a winter peak unless you have significant winter climbing skills.
Is the path easy to follow? Yes, from the layby to the bealach. The path is well-maintained and clearly marked. The ridge traverse to Stob Dubh’s summit is also obvious, but the exposure means you need to stay alert. In mist, the ridge becomes more challenging — bring a map and compass even though the path is obvious in clear weather.
Do I need special equipment beyond standard hiking gear? Standard hiking boots, a windproof jacket, and a backpack are essential. Trekking poles are highly recommended for both the ascent and descent, particularly for stability on exposed sections. In anything other than calm conditions, the poles become genuinely useful rather than optional.
Is Stob Dubh suitable for dogs? The lower path from the layby to the bealach is generally manageable for fit dogs. However, the ridge traverse to Stob Dubh’s summit presents challenges — the narrow, exposed sections with drops on both sides require confident dogs comfortable with height and exposure. The path itself isn’t technical, but the exposure is real. If your dog is nervous on heights or unsteady on rough terrain, this isn’t the best choice. Keep dogs on a lead through any sections with livestock, and be prepared for wind that affects smaller dogs more significantly than larger ones.